
The Best Exercises to Ease a Frozen Shoulder
An orthopaedic surgeon explains the gentle, stage-by-stage movements that carry you through adhesive capsulitis — and why this is one shoulder problem that almost always gets better.
By Dr. Christian Veillette, as told for patients and families
A frozen shoulder is one of the most frustrating conditions I treat, and also one of the most reassuring things I get to tell a patient. Frustrating, because it comes on for no clear reason, hurts a great deal, and steals your ability to reach, dress and sleep for months. Reassuring, because — unlike most shoulder problems — it has a natural end point. In the overwhelming majority of people the shoulder eventually thaws, and with the right approach you can be more comfortable along the way and come out the other side with a shoulder that works.
Frozen shoulder, or adhesive capsulitis, happens when the capsule — the soft-tissue envelope that wraps around the ball-and-socket joint — becomes inflamed, then thickens and tightens until the shoulder is gripped in place. It is not arthritis, it is not a rotator cuff tear, and it is not something you caused by using the arm. It tends to arrive between the ages of 40 and 65, affects women more often than men, and is more common in people with diabetes or thyroid problems, or after a period when the arm was kept still following an injury or operation.
Here is the single most important thing to understand, because it changes how you treat it: frozen shoulder moves through stages, and the right exercise depends entirely on which stage you are in. Push a hot, painful, early frozen shoulder too hard and you provoke it and set yourself back. Baby a stiff, settling shoulder and you leave motion on the table that you could have regained. The art — and the whole point of this routine — is matching gentle, consistent effort to the phase you are in.

Know Your Stage
1. Freezing (Painful Stage)
6 weeks to 9 monthsPain builds, often worst at night, and the joint gradually stiffens. Priority is pain relief; stretching is brief, gentle, and passive.
2. Frozen (Stiff Stage)
4 to 12 monthsSevere pain subsides, but dense stiffness dominates daily living. This is when steady, patient range-of-motion stretching earns its keep.
3. Thawing (Recovery Stage)
12 to 24 monthsMotion gradually returns and pain fades. Now you can stretch more firmly to end-range and add rotator-cuff strengthening.
Your Routine at a Glance
Consistency beats intensity every time. Little and often is ideal for a frozen capsule.
Mobility & Stretches
2 to 3 times daily (short bouts)
Strengthening
3 days / week (frozen/thawing only)
Stretch Duration
15 to 30 seconds (gentle tension)
Sensation Target
Mild stretch, never sharp pain
Before You Start: Critical Capsular Precautions
- Stretch to tension, never to pain: Any soreness after stretching should fade within 15 minutes. An ache that lasts for hours means you pushed too hard.
- Warm up with heat: A warm shower or 10–15 minutes of moist heat before stretching softens collagen and makes movement much easier.
- Never bounce or jerk: Smooth, sustained coaxes lengthen the capsule; jerky ballistic movements provoke muscle spasm and inflammatory flares.
- If pain is unrelenting day and night: Do not force stretches. Focus on pendulums and speak with your doctor about an ultrasound-guided injection to open an exercise window.
7 Exercises for a Frozen Shoulder

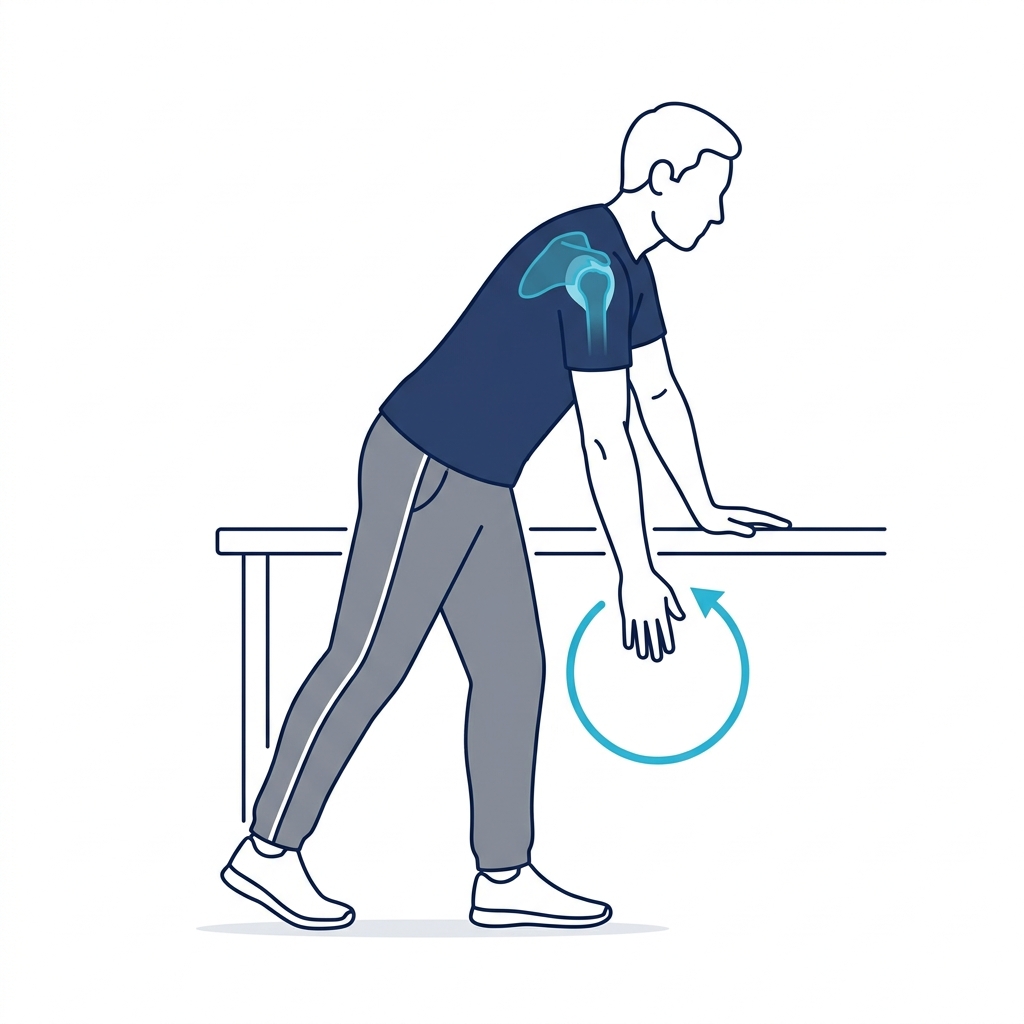
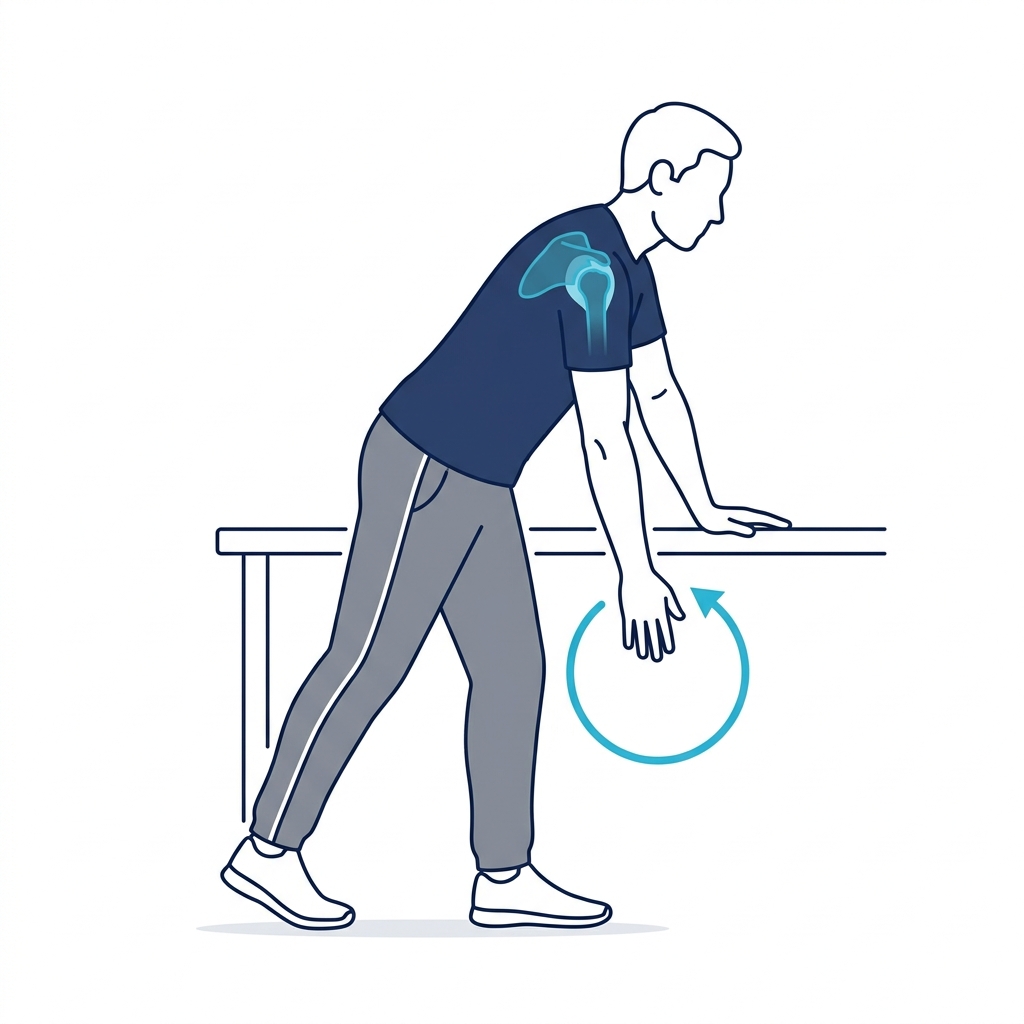
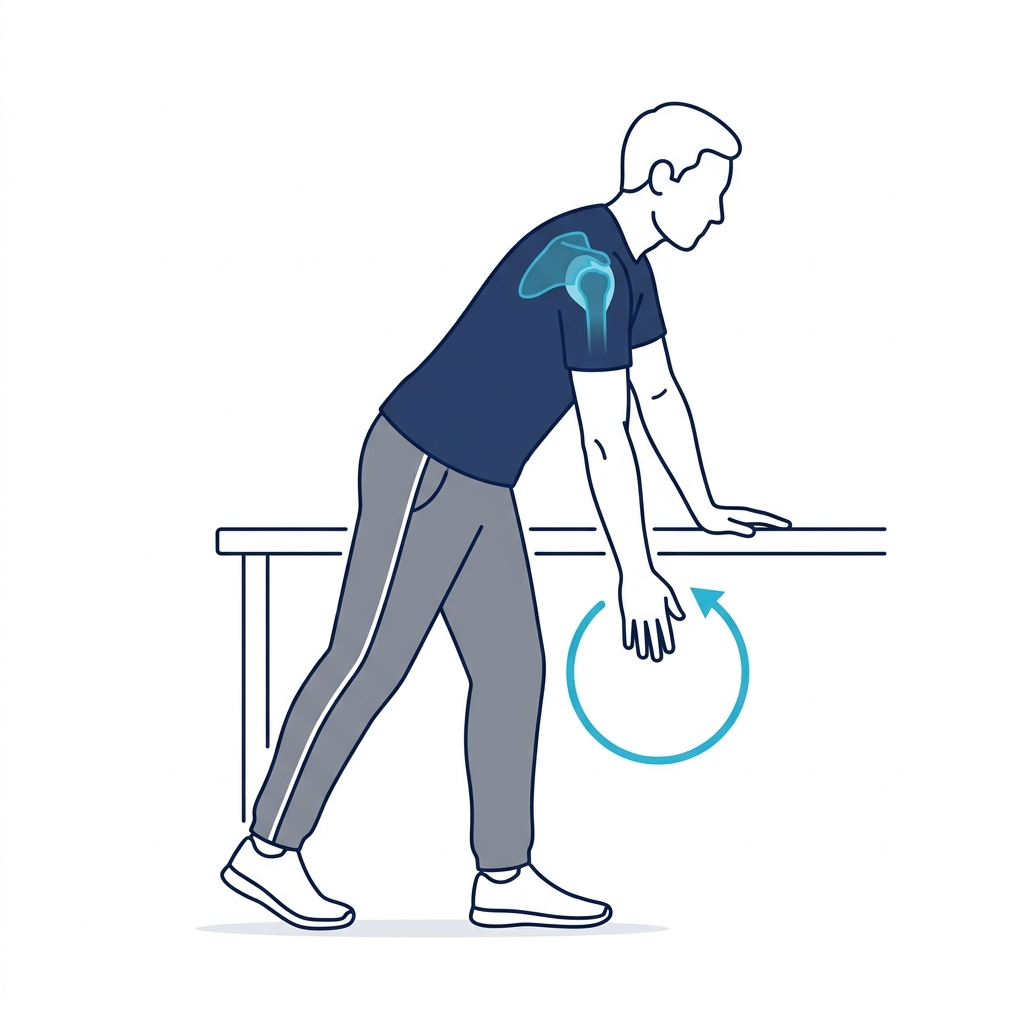
Pendulum Swings
- Lean forward and rest your good hand on a table or chair for support, letting the affected arm hang straight down and completely relaxed.
- Using small movements of your torso and body, not your shoulder, let the arm swing in a small circle about a foot across, then reverse direction.
- Then let it swing gently forward and back, and side to side. About 10 in each direction.

Assisted Forward Elevation with a Stick
- Lie on your back holding a cane, broom handle or dowel across your body, palms down, hands shoulder-width apart.
- Using the good arm to push, slowly raise the stick up and over your head until you feel a gentle stretch in the stiff shoulder.
- Hold briefly, then lower under control. Lying down supports the arm and makes this easier than standing.

Assisted External Rotation with a Stick
- Lie on your back holding the stick in both hands, elbows tucked firmly at your sides and bent to 90 degrees.
- Keeping the affected elbow pinned to your side, use the good hand to push the stick so the affected forearm rotates outward, away from your body.
- Move only as far as you can without sharp pain, hold the gentle stretch for 15–20 seconds, then return slowly.
Finger Walk Up the Wall
- Stand facing a wall about three-quarters of an arm's length away, fingertips of the affected arm on the wall at waist height.
- With the elbow slightly bent, slowly walk your fingers up the wall, spider-like, until you feel a comfortable stretch — the fingers do the work.
- Hold at the top, then walk your fingers back down, assisting with the good arm if necessary.

Cross-Body Reach
- Use your good arm to lift the affected arm at the elbow and bring it up and across your chest at chest height.
- Apply gentle pressure to draw it closer until you feel an easy stretch at the back of the shoulder.
- Hold for 20–30 seconds while keeping the shoulder relaxed and down, then release.

Armpit (Assisted Abduction) Stretch
- Using the good arm, lift the affected arm onto a table, countertop, or shelf at about chest height.
- Gently bend your knees to open up the armpit space, feeling an easy stretch along the underside of the joint.
- Deepen the knee bend slightly to stretch a little further, hold for 15 seconds, then straighten. Repeat 3–5 times.

Resistance-Band Rotations (Later Stages Only)
- Anchor a light resistance band at waist height. Stand side-on and, with elbow tucked, rotate forearm outward away from body, then return slowly.
- Turn around and pull the band inward across your abdomen, elbow still tucked, then return under control.
- Hold each end position for 3–5 seconds, controlling the band in both directions.
3 Targeted Stretches
Towel Stretch Behind the Back
- Hold one end of a bath towel behind your back with the good hand, letting it drape down, and grasp the lower end with the affected hand.
- Use the good arm to gently pull the towel upward, drawing the affected hand a little higher up your back until you feel an easy stretch.
- Hold for 20 seconds, then release slowly. Keep the pull gentle, smooth, and steady.

Doorway Chest and Anterior Capsule Stretch
- Stand in a doorway and rest your forearms against the frame, elbows at or below shoulder height.
- Step one foot gently through the doorway until you feel an easy opening stretch across the chest and front of the shoulder.
- Hold for 30 seconds while breathing smoothly, then step back.
Neck and Upper-Trapezius Stretch
- Sitting tall, let the affected arm hang relaxed or anchor the hand under your chair.
- Gently tilt your head to the opposite side, bringing your ear towards that shoulder, until you feel an easy stretch along the side of your neck.
- Hold for 20 seconds, return slowly, and repeat on the opposite side.
When to See an Orthopaedic Specialist
The vast majority of frozen shoulders recover with patience, staged exercise, and time, with only about 5% to 10% requiring surgical release. However, you should seek specialist evaluation if night pain is severe and robbing you of sleep, if you are making zero progress after several months of diligent exercise, or if you have diabetes (which can make adhesive capsulitis more stubborn and prolonged). In these situations, an ultrasound-guided corticosteroid or hydrodilatation injection can extinguish severe inflammation and open an exercise window. For persistent refractory stiffness, arthroscopic capsular release offers rapid motion restoration.
Dr. Christian Veillette MD, MSc, FRCSC is Division Head of Orthopaedic Surgery at University Health Network (UHN), Associate Professor in the Department of Surgery at the University of Toronto, and an orthopaedic surgeon at the Sprott Department of Surgery and Schroeder Arthritis Institute, Toronto Western Hospital.
Medical Disclaimer: This article is general educational information and not a substitute for individual medical advice. Speak with your doctor or physiotherapist before starting a new exercise program.